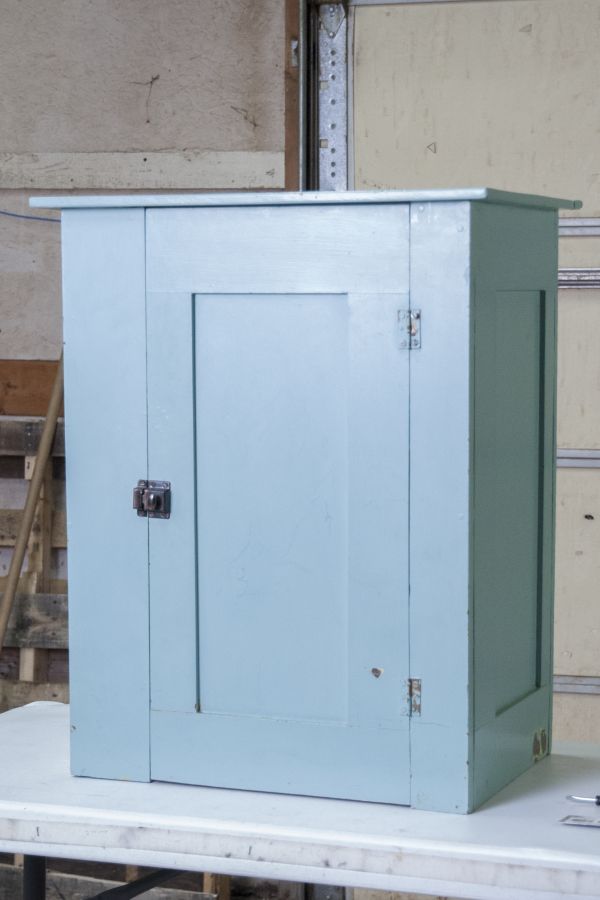
Teal Cabinet Makeover
Cold weather doesn’t have to end your DIY season. We restored this beautiful cabinet in our garage; no mask required! For this project, we used BLUE BEAR Paint Stripper with Safenol™. Containing no NMP or Methelyne Chloride, BLUE BEAR Paint Stripper is safer, and low odor, making it great for indoor projects.
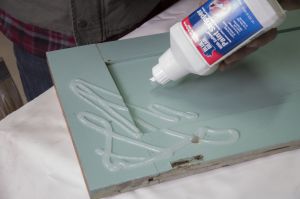
Before we began the stripping, we did a quick test area. Before applying the stripper, give the container a good shake, then we applied it to the back of the cabinet. Test areas are important because they can help determine the coating type, number of layers, and the dwell time necessary to remove all layers of coating. With the information we learned from our test area, we knew there were two layers of paint, and it would take about two hours of dwell time to soften down to the wood. We then went on to remove the hardware, placing it to the side to be stripped later. Next, we applied a generous amount of BLUE BEAR Paint Stripper with Safenol™ across the entire painted surface.
Paint Stripper should be applied to at least the same thickness of the layered paint, or more. A dabbing motion is preferable instead of brushing because brushing spreads the stripper too thin to penetrate multiple coats. Due to its gelled consistency, BLUE BEAR Paint Stripper easily clings to vertical surfaces. If there are multiple layers of paint, however, it is possible that the paint and product may begin to peel away before penetrating through multiple layers of coatings and to the bare wood (this is what happened to us). Securing Paint Stripper to the surface with a light wrap of cling wrap, be sure not to pull too tight.
To strip the hardware, we put a layer of Paint Stripper on the hinges and placed the screws face down on the cabinet door directly into the stripper.
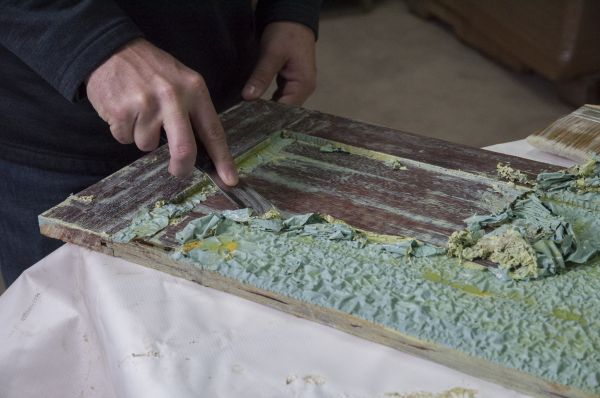
We then let the stripper sit, returning one hour later to check on the progress. The stripper had begun to “alligator,” (see photo) but upon testing with our scraper, we found that the second layer of paint was still securely attached to the wood. We recovered the test area and let it continue to set for another hour.
Two hours later, we returned to the cabinet and began to remove the paint. Since Paint Stripper is non-caustic, it was wonderful to strip the paint without fear of getting it on our skin. The majority of the paint was removed easily with a metal scraper (Paint Stripper will soften plastic scrapers) and placed into a bucket. Paint should be discarded based on your local restrictions.
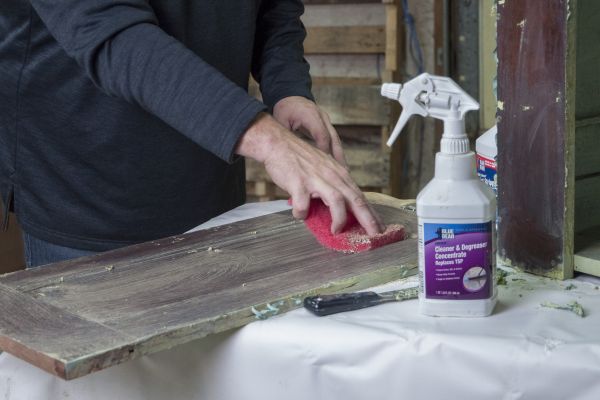
To clean the hardware, I rinsed the hardware with water and removed the residue with a paper towel.
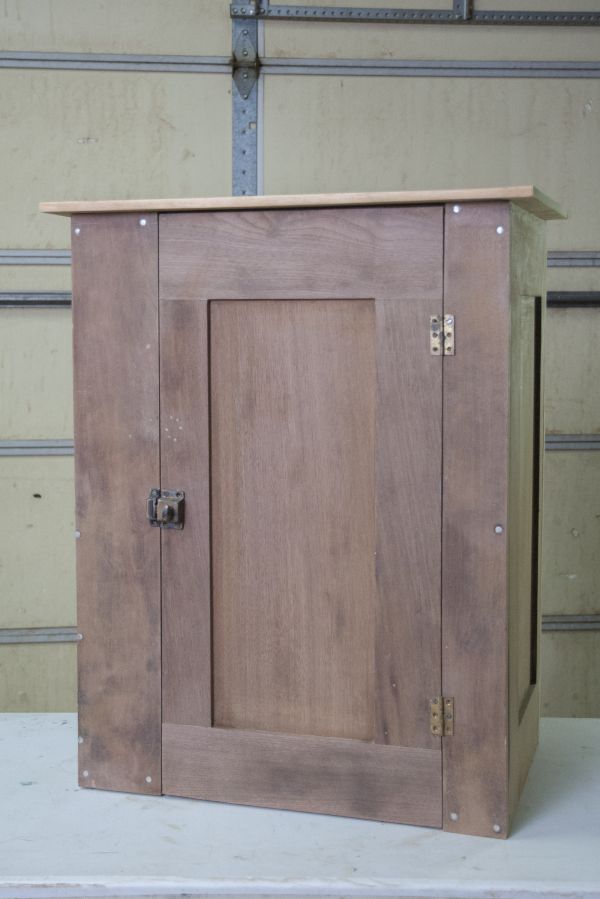
Once the surface was fully cleaned, a bit of sanding was in order. If you are going to repaint this is not necessary, but if you plan to put a new clear coat, sanding is required for a beautiful finished piece. The cabinet was a unique and beautiful mixture of cherry and pine. We guess that the piece was created using salvaged material, leaving us with a truly unique piece! After the stain was removed, the cabinet was complete and ready to be refinished!